Table of Contents
DIY Board and Batten Wall Ideas 2026: Complete Guide
Disclosure: This post contains affiliate links. If you purchase through our links, we may earn a commission at no extra cost to you.
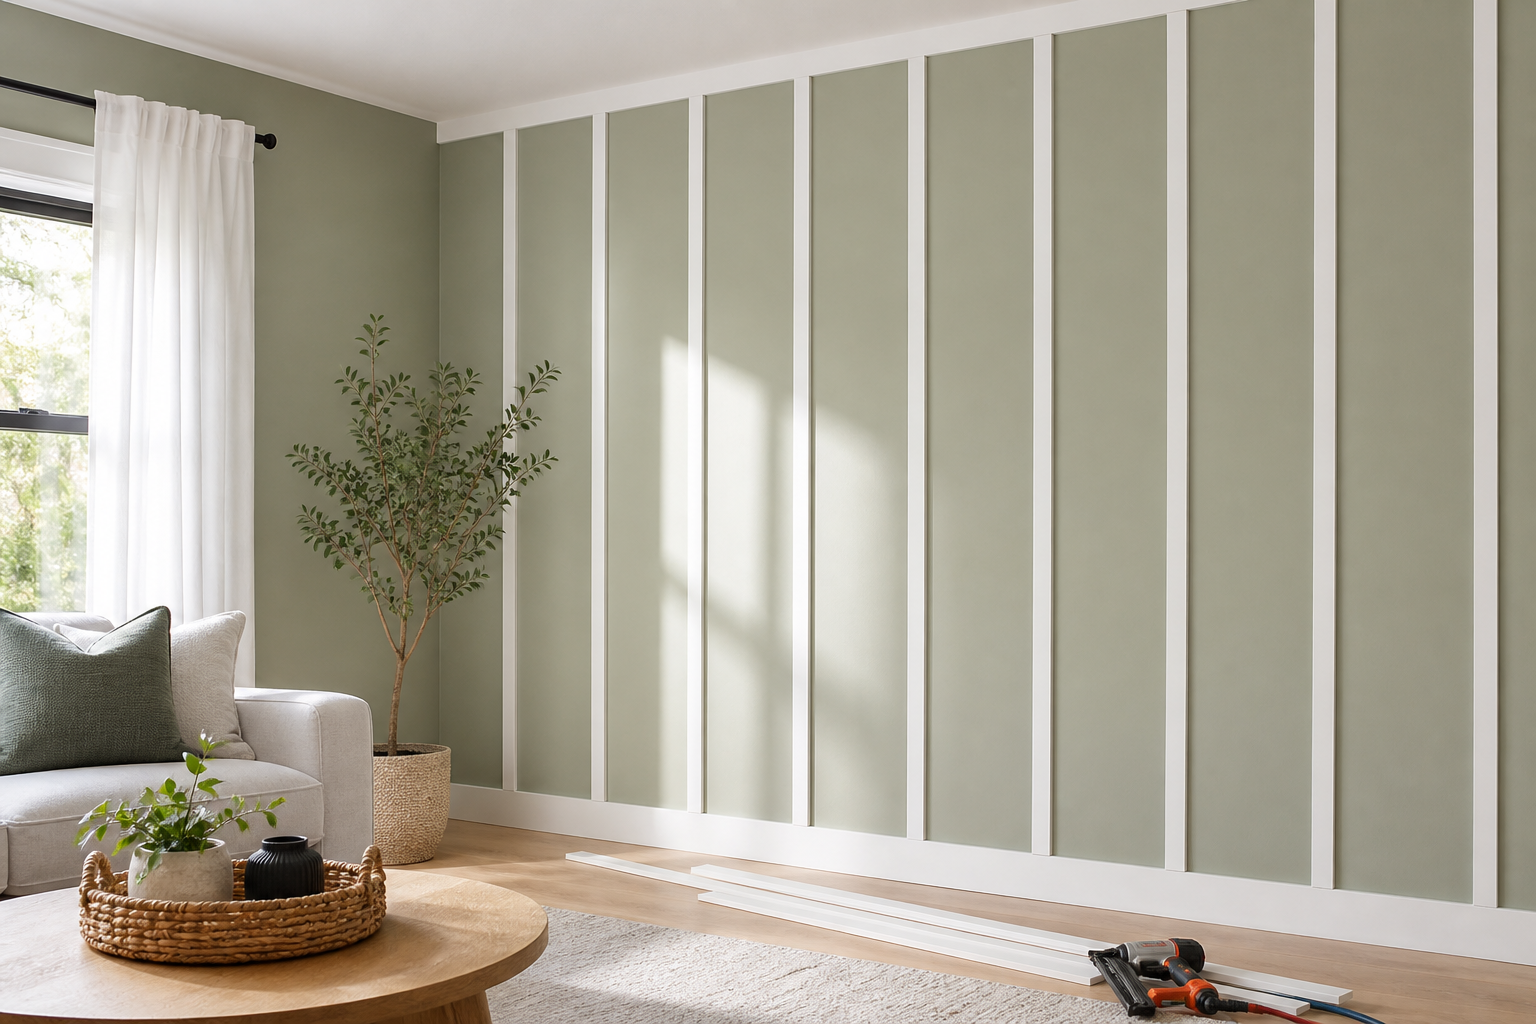
Board and batten accent walls turn a plain room into a space that looks professionally designed without the professional price tag. In 2026, architectural wall treatments are dominating interior design trends, offering a strategic way to add depth and character to sterile modern builds. According to recent housing market analysis, homes with detailed millwork sell faster and often at a higher price point than those with plain drywall. The best part is that the materials typically cost between $80 and $200 for a single accent wall, and most first-timers finish the project in a single weekend. This guide covers six distinct looks, a full spacing formula, a material list with current 2026 pricing, and an honest cost breakdown so you know exactly what you are getting into before you buy a single board. Whether you are aiming for a modern farmhouse aesthetic or a moody contemporary vibe, this tutorial ensures your DIY project stands the test of time.
About the author: Lisa Morgan is an interior designer and home stylist who covers budget-first decorating for 4casahome.com. She focuses on DIY techniques that deliver visible results without a contractor budget.
What Materials Do You Need for a Board and Batten Wall?
To successfully complete this project, you need MDF boards, paintable caulk, construction adhesive, primer, paint, and a brad nail gun. That is the full short list. However, having the right tools makes the difference between a weekend project and a month-long struggle. Here is what each item does and exactly what to buy to ensure a professional finish that mimics custom carpentry. Investing in quality materials now prevents warping and cracking later, saving you money on repairs down the line.
The Boards
For vertical battens, 1×2 or 1×3 MDF strips are the standard choice. MDF is dimensionally stable, accepts paint without grain bleeding through, and costs significantly less than solid wood. A 1x3x8 MDF strip runs approximately $4 to $7 at most home improvement stores based on 2025 and 2026 retail pricing at major retailers like Home Depot and Lowe’s. For the horizontal top rail and bottom base rail, use the same profile or step up to a 1×4 for more visual weight. Always acclimate your boards to the room temperature for 24 hours before installation to prevent warping. This step is crucial in climates with high humidity fluctuations.
Avoid natural pine if you are a beginner. Pine is more affordable but tends to show grain even under primer, and knots can bleed through paint over time. MDF eliminates both problems, providing a smooth surface ready for paint. For bathrooms or laundry rooms, switch to PVC trim boards. They cost about 30 percent more than MDF but will not swell in humidity, ensuring your wall treatment lasts longer in wet environments. PVC is also easier to clean, making it ideal for high-traffic areas.
Fasteners and Adhesive
A brad nail gun (18-gauge) paired with 1.5-inch nails is the fastest way to attach battens to drywall. You do not need to hit a stud for every batten. Construction adhesive on the back of each board holds it in place between nails, providing structural integrity without excessive drilling. If you do not own a brad nail gun, you can rent one from Home Depot for about $30 per day, or use a manual finish nailer. Hammer and nails work but leave more surface holes to fill, increasing your prep time significantly. Liquid nails or similar heavy-duty construction adhesive is recommended for maximum hold.
Amazon is the easiest place to source your full material kit. You can order MDF lattice strips, construction adhesive, paintable caulk, and a brad nailer bundle without making three separate store trips. Shop board and batten supplies on Amazon and check the “frequently bought together” bundles for nailer plus adhesive combos. This often saves on shipping costs and ensures all components are compatible.
Essential Tools and Finishing Supplies
Beyond the raw materials, specific tools ensure precision. You will need a miter saw for clean 45-degree corners, a stud finder to locate anchors, and a laser level for perfect horizontal lines. For finishing, gather the following:
- Paintable latex caulk: Fills gaps between board edges and drywall so paint blends seamlessly.
- Sandpaper (120 grit): Smooths MDF edges and nail hole filler for a glass-like finish.
- Wood filler or spackling: Covers brad nail holes effectively.
- Primer: MDF must be primed before painting or the surface will absorb too much paint, leading to uneven coverage.
- Paint: One quart covers a standard 10-foot accent wall; one gallon covers a full room.
- Safety Gear: Always wear safety glasses and a dust mask when cutting MDF to avoid inhaling fine particles.
How Do You Install a Board and Batten Wall Step-by-Step?
Knowing the materials is only half the battle. Proper installation ensures your wall looks custom-built rather than slapped on. Follow this sequence to minimize errors and maximize efficiency. The most critical part of this process is the layout, as uneven spacing will be immediately visible once painted. Rushing the prep work is the most common mistake DIYers make, so dedicate ample time to measuring and marking.
Step 1: Prep and Layout
Remove any outlet covers and clean the wall surface to ensure adhesive bonds correctly. Use a stud finder to locate studs along the wall and mark them lightly with a pencil. While you do not need to nail into every stud, knowing where they are helps anchor the heavier top rail securely. Use a level to draw a light pencil line where your top rail will sit. This ensures your horizontal line is perfectly straight even if your ceiling is not. If you have electrical outlets on the wall, plan your batten spacing so that a vertical board does not cut directly through the center of an outlet box. You may need to adjust spacing slightly to frame the outlet neatly.
The Spacing Formula
Consistent spacing is the hallmark of a professional job. To calculate your batten spacing, measure the total width of your wall in inches. Decide how many battens you want or the desired gap size. A common formula is: (Wall Width ÷ Desired Gap) = Number of Spaces. Then, divide the wall width by the number of spaces to get the exact center-to-center distance. For example, on a 120-inch wall, if you want 10-inch gaps, you will need approximately 11 spaces. Mark these intervals lightly on your top and bottom rails before cutting any vertical pieces. For a standard look, aim for gaps between 6 to 10 inches. Wider gaps feel more modern, while narrower gaps feel more traditional.
Step 2: Cut and Attach Rails
Install the bottom base rail first, ensuring it sits flush against the existing baseboard or replaces it. Next, install the top rail at your designated height, typically 32 to 36 inches for half-walls or ceiling height for full walls. Apply construction adhesive to the back of the boards and secure them with brad nails every 12 to 16 inches. Use a laser level if available to ensure the top rail is perfectly horizontal across the entire length of the wall. If your floor is uneven, measure from the ceiling down rather than the floor up to maintain visual symmetry.
Step 3: Install Vertical Battens
Using your spacing formula, mark the location of each vertical batten on the top and bottom rails. Cut your vertical strips to size. Apply adhesive to the back of each batten and nail them into place. Ensure every batten is perfectly plumb using a level before nailing. If you hit a stud, great; if not, the adhesive and nails into the drywall will hold sufficient weight for decorative purposes. Check each batten twice before committing to nails, as adjustments become difficult once adhesive sets.
Step 4: Fill, Caulk, and Paint
Fill all nail holes with wood filler and sand smooth once dry. Run a bead of paintable caulk along the top, bottom, and sides of every board where it meets the wall. This step is crucial; it makes the boards look like they are part of the wall structure rather than attached on top. Prime the entire wall, including the drywall gaps between battens, then apply two coats of your chosen paint color. Allow 24 hours of drying time between coats for the hardest finish. Proper caulking is the secret to a high-end look.
What Are the Best Board and Batten Wall Ideas for 2026?
The six looks below cover the most-searched styles for 2026. Each one can be adapted to a bedroom or a living room with a simple color swap. Trends are shifting towards darker, moodier tones and more complex grid patterns this year. Lighting plays a huge role in these designs; consider adding sconces between battens to highlight the texture. These designs are versatile enough to suit both rental properties and forever homes.
1. Classic White Half-Wall
The horizontal top rail sits at chair-rail height (typically 32 to 36 inches from the floor). Battens run from the baseboard up to that rail. Paint everything the same white as the trim in the room. Above the rail, use a soft warm white or a light neutral. This is the entry-level version: forgiving on spacing, fast to paint, and works in any room style. Cost range: $80 to $120 for a 10-foot wall. It brightens dark hallways and makes small rooms feel larger.
2. Full-Height Moody Dark Wall
Run battens floor to ceiling with 16-inch spacing and paint
Get the 4casahome digest
Honest reviews and no-hype guides — straight to your inbox. No spam, unsubscribe anytime.
Some links in our articles are affiliate links. See our full Affiliate Disclosure for details.
Related Articles
Written and tested by our editorial team
4CasaHome Editorial Team
Interior Design & Smart Home Experts
All product reviews are based on hands-on testing in real home environments. Smart home content is verified by our CEDIA-certified integrator. Meet our team.