Table of Contents
title: “Color Capping Walls: How-To Guide + 5 Designer Secrets (2026)”
slug: “color-capping-walls-how-to”
domain: “4casahome.com”
primary_keyword: “color capping walls how to”
date: 2026-07-13
word_count: 2780
status: draft
meta_description: “Learn how to paint color capping walls step by step: where to place the transition line, which palettes work in 2026, tools you need, and 5 secrets designers use.”
schema:
– Article
– FAQPage
– Author
Disclosure: Some links in this article are affiliate links. If you buy through them, we earn a small commission at no extra cost to you.
Color Capping Walls: How-To Guide + 5 Designer Secrets (2026)
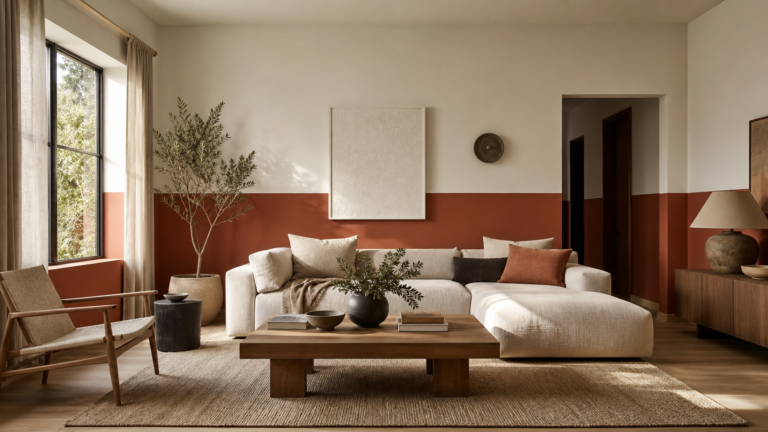
The upper third of your wall is one of the most underused design surfaces in any room. Color capping fixes that by painting the top section a deeper or contrasting tone while leaving the lower portion neutral. The result: walls feel taller, rooms feel defined, and the whole space looks like a decorator touched it.
Elle Decor named color capping one of the biggest paint trends of 2026 (source). This guide walks you through every step, from measuring the transition line to choosing the right palette, with five insider techniques that make the difference between “nice” and “wow.”
What Is Color Capping and Why Is It Trending?
Color capping is a tonal painting technique where the upper portion of a wall (roughly the top third) is painted in a darker or contrasting shade, while the rest stays lighter. Think of it as the modern, paint-only answer to wood paneling or picture rail molding.
The concept is not entirely new. European interior designers have used tonal wall techniques for decades. What changed in 2026 is the palette: designers moved away from stark two-tone contrast and toward tonal families, picking three shades from the same color strip and layering them from light at the bottom to deep at the top.
This approach works for renters, too. It requires no wallpaper, no paneling, no landlord permission beyond standard painting approval. You roll on color, and you can roll it back off.
Color capping also works in reverse: some designers place the darker color on the lower half and keep the ceiling area lighter. That version anchors furniture and adds warmth at eye level. Both directions are valid, and this guide covers both.
How to Measure Color Capping Walls
For standard 8-foot ceilings, place the transition line 48 to 54 inches from the floor. That positions the darker zone at roughly the top third of the wall, which is the proportion that reads best to the eye.
Here are the measurements for other ceiling heights:
| Ceiling Height | Transition Line (from floor) |
|---|---|
| 8 feet (96 in) | 54 to 60 inches |
| 9 feet (108 in) | 62 to 68 inches |
| 10 feet (120 in) | 70 to 76 inches |
The formula: aim for the transition at roughly 60 to 63 percent of total wall height. That keeps the lower zone dominant and prevents the room from feeling top-heavy.
To mark the line, use a tape measure and a laser level (or a standard level with a long straightedge). Mark light pencil dots every 12 inches across the wall at your chosen height. Connect the dots with painter’s tape. Run a second strip of tape 1 inch above the first so your brush has a clean edge to follow.
For rooms with chair rail molding already installed, use the molding as your natural transition point. For rooms with no architectural detail, the tape line becomes your own molding.
Color Capping Walls Ideas: Palette Combinations That Work
The best palettes for color capping pair a warm or cool neutral base with a deeper tone 2 to 3 shades darker on the same fan deck strip.
Picking colors from the same manufacturer’s fan deck strip is the fastest way to guarantee the tones read as intentional rather than accidental. Pull the strip, pick the lightest shade for the lower wall, the middle shade for the transition zone if you want a soft middle band, and the darkest for the cap.
Five palettes confirmed for 2026:
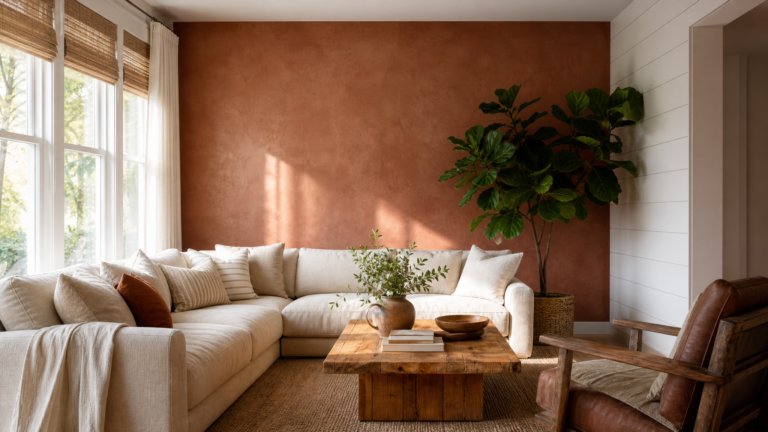
- Warm clay family. Creamy bisque on the lower wall, terracotta mid-tone, deep rust cap. Works in kitchens, dining rooms, entryways.
- Dusty blue family. Pale sky on the lower wall, slate blue cap. Calm, almost Scandinavian. Ideal for bedrooms.
- Olive and forest green. Sage lower wall, deep forest cap. Pairs with warm wood floors, rattan furniture. See more ideas in our guide to biophilic design home ideas.
- Mauve to plum. Blush lower wall, deep mauve or dusty plum cap. Feminine without being pink.
- Greige to charcoal. Off-white lower wall, warm charcoal cap. The most versatile option. Works in any room, any furniture style.
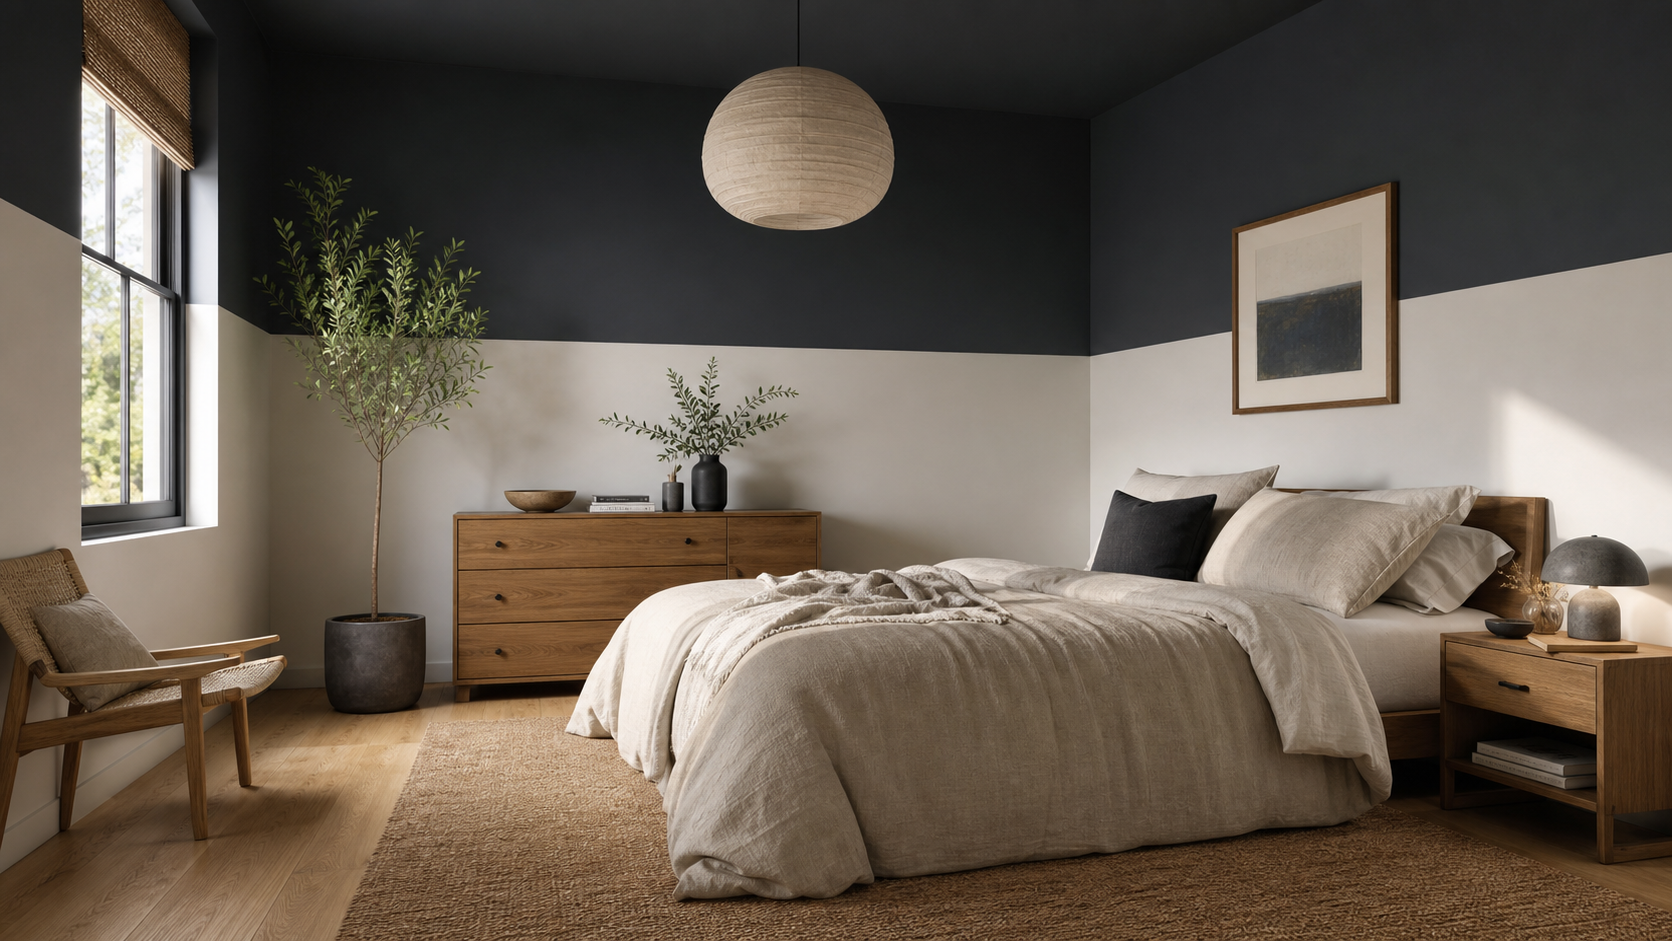
Color capping with dark colors is the bolder version. Navy, deep forest, charcoal, and plum caps all create a cocooning effect. The key with very dark caps: paint the ceiling the same dark shade to avoid a floating stripe. When the dark runs continuously from wall cap to ceiling, the room feels intentional rather than unfinished.
For more accent wall approaches, our DIY accent wall ideas for the living room covers other techniques that pair well with color capping.
What You Need: Tools, Materials, and Where to Buy
The full color capping process requires about $80 to $140 in supplies if you are starting from scratch. Here is the complete list.
Paint:
– 1 gallon of your lower wall color (eggshell or satin finish)
– 1 quart of your cap color (satin or semi-gloss holds the line better at the top)
– Optional: 1 quart of a mid-tone if you want a subtle three-band effect
Tools:
– Painter’s tape (Frog Tape or equivalent)
– Laser level or bubble level plus long straightedge
– Tape measure
– Small angled brush (2.5 inch) for cutting in at the line
– 9-inch roller with 3/8 inch nap for flat walls
– Paint tray and liners
– Drop cloth or plastic sheeting
– Pencil for marking dots
Recommended pick on Amazon: The Purdy 144080925 XL Series paint brush set is the most consistently reviewed option for cutting a clean line at the transition. The angled bristle design gives precise control without requiring a steady hand. Available on Amazon alongside painter’s tape, rollers, and drop cloths in one order.
For paint itself, Wayfair carries pre-tinted sample pots and small quarts from brands like Clare and Backdrop if you want to test before committing to a gallon. The Home Depot paint counter will custom-mix any shade to your spec if you bring in a fan deck code or a photo.
Step-by-Step: How to Paint Color Capping Walls
The full color capping process takes one weekend and requires 6 steps.
Step 1: Prep the wall.
Fill any holes with spackle, let it dry, and sand smooth. Wipe the wall with a damp cloth to remove dust. If the lower wall color is new, paint it first and let it cure for at least 24 hours before taping.
Step 2: Mark the transition line.
Using your tape measure and a pencil, mark light dots at your chosen height every 12 inches around the room. Use a laser level or bubble level to confirm the dots are level (not following the ceiling, which may not be perfectly flat). Connect the dots with your first strip of painter’s tape, sticky edge facing up.
Step 3: Apply tape.
Place a second strip of tape directly above the first, sticky edge facing down. This double-tape method protects the lower wall color from brush bleed. Press both strips firmly with a putty knife or credit card to seal the edges.
Step 4: Cut in the line.
Using your angled brush, paint a 2 to 3 inch band along the tape line with your cap color. Work slowly. Let this band dry for 30 minutes before rolling.
Step 5: Roll the cap.
Roll the cap color from the tape line up to the ceiling. Apply two coats. Let the first coat dry completely (1 to 2 hours) before applying the second.
Step 6: Remove tape.
Pull the tape while the second coat is still slightly tacky, at about 80 percent dry. Pull at a 45-degree angle back toward the painted surface, not straight out. This prevents peeling and gives a crisp edge.
Touch up any bleeds with a small brush and either color once the wall is fully dry.
For more home decor ideas and transformation guides, browse the full library on the site.
5 Designer Secrets for Color Capping Walls
These are the techniques that separate a DIY color cap from a designer-executed result.
Secret 1: Skip the 50/50 split.
Splitting the wall exactly in half is the most common mistake. The lower zone should always be larger: aim for 60/40 or 65/35 (light bottom, dark top). A larger lower zone grounds the furniture and keeps the room open.
Secret 2: Match the cap to the ceiling.
When you are using a medium or dark cap color, paint the ceiling the same shade. The color runs from the cap up to and across the ceiling with no break. This elongates the wall visually and makes the transition feel architectural, not painted-on.
Secret 3: Test in three lights.
Paint a 12 by 12 inch swatch of your cap color on the upper wall and observe it in morning light, afternoon sun, and evening lamp light before buying a full gallon. Dark colors shift dramatically between daylight and artificial light. A color that reads as navy in sunlight can look nearly black under warm LED bulbs.
Secret 4: Use the same sheen on both zones.
Mismatched sheens (flat lower wall, semi-gloss cap) create a visible texture difference that draws the eye for the wrong reason. Use eggshell throughout for a consistent surface. Reserve semi-gloss only for ceilings.
Secret 5: Extend the cap around all four walls.
Color capping on one wall only reads as an accent wall, not as color capping. The technique works because it wraps the room and creates a horizon line that your eye follows around the space. Treat all four walls consistently and the effect becomes architectural.
Color Capping Walls: Before and After Examples
Understanding how the technique reads in real rooms helps you predict results before you buy paint.
Small bedroom (10 x 10 ft, 8-foot ceiling).
Before: flat white walls, no architectural detail, ceiling fan as the only visual anchor.
After: creamy linen lower walls, warm taupe cap at 54 inches, matching taupe ceiling. The room reads taller and more intentional. The furniture (a platform bed, two nightstands) appears more grounded because the lower wall wraps around it at the same level as the headboard.
Open-plan living room with low ceilings.
Before: 8-foot ceilings painted bright white, which emphasizes the low height.
After: soft greige lower wall, charcoal cap starting at 58 inches, charcoal ceiling. The ceiling effectively disappears because it is the same color as the cap. Guests report the room feels bigger, not smaller. The dark cap draws attention away from the ceiling height.
Renter-friendly version.
Apartment with white walls and a landlord who allows painting with restoration on exit. Color capping in a sage-to-forest green works well here because the lower wall remains close to original white (just a light sage) and restoration is easy. The full cap can be covered with two coats of white on exit.
Color capping with dark colors.
A study painted with a rich navy cap and a pale ivory lower wall. The transition line sits at 62 inches on a 9-foot wall. The navy extends across the ceiling. Bookshelves installed against the navy cap wall read as built-in because the dark background absorbs the bracket hardware. The effect requires about 1.5 quarts of dark paint and a steady cutting hand. It is not harder, just more committed.
Color Capping vs Two-Tone Walls: Key Differences
Color capping and two-tone walls are related techniques but produce different results.
| Feature | Color Capping | Two-Tone Walls |
|---|---|---|
| Color direction | Light bottom, dark top | Any split, any colors |
| Sheen difference | Usually same sheen | Often different sheens |
| Ceiling treatment | Cap color extends to ceiling | Ceiling usually stays separate |
| Visual effect | Taller walls, cocooning feel | More graphic, higher contrast |
| Skill level | Beginner to intermediate | Beginner |
| Best for | Small rooms, bedrooms, studies | Living rooms, accent walls |
The main practical difference: two-tone walls stop at a crisp line and leave the ceiling as a third element. Color capping absorbs the ceiling into the top zone, which reduces the number of visible planes and makes smaller rooms read as larger.
If you want higher contrast and a more graphic result, two-tone is the direction. If you want architectural depth and a room that feels more considered, color capping delivers that result with the same amount of paint and effort.
Frequently Asked Questions
What height should color capping start on an 8-foot ceiling?
Place the transition line between 54 and 60 inches from the floor for an 8-foot (96-inch) ceiling. That puts the darker cap at roughly the top third of the wall, which is the proportion interior designers recommend for a balanced look.
Can renters do color capping without losing their deposit?
Yes. Choose colors that are close enough to your original wall tone that two coats of white will cover them on exit. Very dark caps (navy, black, deep plum) may require a primer coat before the white restoration coat. Always confirm with your landlord before painting.
Do I need to paint the ceiling the same color as the cap?
It depends on the cap color. For light or medium caps (soft taupe, sage, dusty blue), a white ceiling works fine. For medium-dark or dark caps, painting the ceiling the same color produces a much more polished result. The dark color “floats” awkwardly against a white ceiling.
What is the difference between color capping and color blocking?
Color blocking uses two or more contrasting colors in geometric shapes, often with hard lines and strong contrast. Color capping specifically refers to the top-of-wall technique using tonal shades from the same color family. Color blocking is graphic; color capping is tonal and architectural.
How much paint do I need for color capping a standard bedroom?
For a standard 12 x 12 bedroom with 8-foot ceilings, you need approximately 1 quart of cap color (covering the top third of four walls plus the ceiling if you extend it). Buy a quart first to confirm coverage, then purchase a second quart if needed for the second coat.
Get the 4casahome digest
Honest reviews and no-hype guides — straight to your inbox. No spam, unsubscribe anytime.
Some links in our articles are affiliate links. See our full Affiliate Disclosure for details.
Related Articles

Written and tested by our editorial team
4CasaHome Editorial Team
Interior Design & Smart Home Experts
All product reviews are based on hands-on testing in real home environments. Smart home content is verified by our CEDIA-certified integrator. Meet our team.